Showing posts with label creative. Show all posts

Tuesday, February 26, 2013

Minecrafting LvL 9000

To date, my most ambitious endeavor in Minecraft has to be, the House. Simply put, it's tedious and detailed and gigantic in proportions. This house is around 150 blocks tall, probably 10 times that in area.

It's a two story house. I'm sure you're thinking, a house? on minecraft? pfft, big deal.

Well, get ready to have your genitals blown clean off from excitement!

This is no mere Minecraft house. This is THE Minecraft house.

Observe:

This is the front of the house. Please bear in mind that this is all still under construction but we are nearing the last stretch of work. Also the interior is quite dark in these pictures. In the game your gamma has to be at 100% to be able to see clearly and the pictures were taken at 50% gamma (default) and then brightened considerably.


The living room is the first room on the right when you come in the door. 


Here's another view of the living room. That's SpongeBob on the Big Screen TV.


This is the brightest room in the house because of its nearly all glass ceiling. It's got a comfy bay window seat and an aquarium. 


The dining room and the kitchen are directly below the major part of the 2nd floor and are therefore, the darkest rooms in the house. Please forgive the crudeness of the pictures.


Most of the appliances, carpet, and wall decorations are retro inspired. I just love the rounded edges and bright colors. Quite a challenge to replicate with blocks, I should add.


First up, on the second floor is the spare bedroom. I went for cool bright colors and ended up with what some may think is a child's bedroom. Lol, maybe I did it subconsciously.


Here's the bathroom. It's got a toilet, giant fat bottom tub, and walk in shower. Every sink in the house works properly with some red stone technology. ;) The dark thing on the bottom right hand in the sectioned off toilet area.


This is the master bedroom. The furniture is french inspired, a vanity, and a chaise lounge chair. I went with darker colors and simpler patterns for what I think is a sexy grown up room. :) It also has a walk in closet, not pictured, and plenty of skylight.


Among the things not pictured are the car port, game room, backyard, river, and soon to be built fire pit and BBQ areas. 

I have lined up a video session with a good friend and video editor who will be posting this to youtube once it is complete in the coming weeks. Until then, my world is always open when I'm online and building. I will be accepting temporary friend requests to anyone who wants to see my world but you have to tell me that is why you want me to accept your request, otherwise it will be denied. I usually delete the temporary requests after 24 hours. 


That is all for now fellow Minecraft addicts.

Thanks for reading.
Love,
LaLadyPanda

Friday, January 18, 2013

Period Preparation and Survival Manual

Once a month, like shapeshifting monsters from fiction novels, most of female kind spawn tortured versions of themselves in the midst of a horrible, pain filled transformation also known as the Menstruation Cycle.


Lol.


I know some girls like me have short, 3 day periods. Other's deal with cycle's that last as long as a week and other poor souls last for 10 to 14 days. The pain can vary from bothersome to crippling and it all sucks! Every symptom, every feeling and emotion is heightened and suck suck sucky! 

As with everything I do, I approach it logically and analytically. As a result, I've developed a PPSM or Period Preparation and Survival Manual. 


PPSM: 
The Period Preparation and Survival Manual
aka Shark Week Prep


Here are some things that might help:

-Heating pads (duh right?)

 It sounds stupid but essentially a period cramp is just a muscle cramp and heat does wonders to make you feel better. Store bought heating pads don't last very long and can be quite expensive when you're running through 1-2 per hour for those extra painful first, middle, or last days of your period.

Solution: Using a clean sock or sweater sleeve, fill it with rice and tie or sew the ends. If you happen to have lavender oil around, put some in there! The smell will aromatically help you relax too. The great thing about homemade heating pads is that you can make them any size you want. I have two for hiding in my extra comfy granny panties (front and back) and a long sweater sleeve one for my neck/shoulders.

pic courtesy of http://balkanstyle.blogspot.com/2010/02/rice-sock.html


-Vitamins


 During your menstrual cycle, women lose from .5 ro 2.5 oz. of blood per day. That means you're essentially losing a lot or iron and calcium. This is called anemia. To combat anemia you need to take in more iron.

Try eating some red meat (cooked obviously) or dark greens. Some women take iron supplements but please consult your doctor first as taking iron supplements means you need to monitor and possibly change your diet. Certain things like wheat do not go well with iron supplements. Making sure that you're taking in vitamins to supplement your loss will help with fatigue, head and body aches.

-BANANAS!

 Yes, bananas! Among other things, banana's have potassium, iron, tryptopham, vitamin B, and fiber.

Potassium helps with easing cramps. Iron helps with anemia. Tryptopham helps combat sadness. Vitamin B gives you energy. Fiber keeps your intestinal tract relaxed and constant.


These are Banana Pancakes:

1 ripe banana
2 large eggs
dash of cinnamon
Tsp. of Vanilla

Mix until you have a batter like blend and then pour into pan to make flour-less Banana-cakes!

What's not to love about bananas? Here's more info on how helpful banana's are:

http://pmsfactor.com/blog/50/banana/

-Water


 Drinking water is highly important all the time but even more so during your cycle. Women tend to lose that glowing factor because of our loss of valuable vitamins and minerals during the cycle.

That makes your hair look dull, your nails feeble, your body bloat and even your skin pale. Drinking more water can help combat these problems.

-NTD: NO TO DAIRY


 Cheese and milk in particular. Whole milk especially. This will reduce bloating.

-YTC: YES TO CHOCOLATE

This isn't a medical recommendation. I just always crave chocolate. It's mostly because chocolate triggers endorphins and serotonin which are your brains natural happy drugs!

When you eat too much chocolate though you feel sleepy and groggy and you get tummy aches which is no good. So here's what I do:

Take a banana and a strawberry, cut them into small bits, put them in a cup with nutella or melted chocolate. Freeze the cup with a stick in the middle. I normally don't exceed 1-2 ounces. Try your hardest not to eat too many of these. Hopefully yours is more fruit than chocolate, unlike mine. :)

Also some people use ice trays like this cool person on Pinterest.


-Scheduling

 This may seem silly but when I was younger, I never kept track of my period. I was all too happy to forget all about it the minute it stopped until it surprised me again the next month.

BE ONE STEP AHEAD OF YOUR FOE!

By keeping track of it, you'll know when to expect it (hopefully). For those of you who are more regular than others try these preparation tips one week before your scheduled cycle. Stay ahead of the curve and curve those symptoms!


For those of you who never know when it's going to happen, try keeping this list and the water, vitamins, heating bags/pads, tampons, and sanitary napkins in a box labeled PPSM.

It can be like an emergency kit for your womanhood!


These may seem more like logic than magic but being prepared goes a long way when you're feeling crappy and need relief. I hope this helps and good luck my friends!

Thanks for reading!
Love, 
Mery Ann

Tuesday, October 23, 2012

1.8.2 is FINALLY HERE!

So many new things are happening in my world lately, I can hardly keep up! I'm really sorry I haven't been blogging as much but I will definitely be making up for lost time. :)

I'm super proud and excited to tell you guys that I am now the Gaming Correspondent and newest cohost to the blog talk radio station, The Geek Supremacy!

Please click this link and like us on Facebook:

The Geek Supremacy Project

We cover all things Geek! from movies, comics, tv, to video games and music so definitely check us out. :) We've been discussing doing a vlog or video podcast as well and although I'm nervous as all hell about it, I'm leaning towards yes.

I know I'll get a lot of flack from some viewers for being a big girl but I don't think I'll let it get to me. I recently came across a tv show and magazine about plus sized (actual plus sized not that 'real size' bullshit the mainstream media want us to swallow) models and I think if I weren't so short, or agoraphobic, I'd seriously consider trying out some modeling. Holy shit balls, just thinking about that makes me anxious. SHEESH! Moving on!

In crochet news, I have been designing some super geek chic apparel for our noggins. From Skyrim Iron Helm hats to super hero beanies! Get ready to gear up geek style soon! If you can't wait for me to stumble upon the hat you want, be sure to request a custom made hat for yourself on my etsy shop. It's easy! You click it, send me a note of what you want and I create it for you! Prices are discussed and paid for up front and the turn around time is usually 7-10 business days but I can usually do it in less time.

Click the link below and then Request Custom Item on the bottom left hand side menu:

Cool Beans and Things Etsy Shop


Most of us are eagerly awaiting the release of some huge games this year such as Assassin's Creed III, Halo 4, and Black Ops 2 and the wait is getting shorter folks. I want to give you guys a heads up on an all new FREE TO PLAY (yes, FREE!) game on Xbox Live.

The new and improved dashboard came with some impressive add ons such as Internet Explorer and all new Xbox Music, but a little known new program came along for the ride where free to play games will also be supported by Xbox Live. The first of many, Happy Wars is a super fun 15 on 15 multiplayer game where tiny little warriors battle it out to destroy the other teams castle. You can choose from a warrior, cleric, and mage class and level your character items with stars won in the game or tickets purchased with Microsoft points. 


If you haven't check it out yet my friends, give it a try. There are set times Bonus Time during the day where you get bonus XP and games can be harder to find but there is also a co-op and campaign mode. What better way could there be to 'kill' time then to play a new and free game? Go check it out! 


Now for some Minecraft news: First of all I wanted to showcase some of my newest Minecraft creations with you guys. Since the 1.8.2 update hit Xbox we now have CREATIVE MODE and UGH! Where have you been all my life? As if flying around and running super fast aren't awesome enough, the creative mode menu is a miracle and so easy to use!

My one and only gripe is that the water and lava buckets don't automatically refill and there's no shortcut to delete something from your hot bar. Some people opt to make a lava pit garbage disposal nearby or select the item in the menu then back out to make it disappear. There should be an easier way to do that though.

Now, everyone knows that Pandaland was a huge endeavor for my friends and I and there was a lot of compliments and criticism for it from the gaming community. This time around, I'm really spreading my creative juices allll over Minecraft's face!

I decided to do not one, but 4 parks in an all new, super huge PANDA WORLD! So far we've done the main entrance, a candy shop, a souvenir shop, the 4 park entrances, and 3 rides for the Water Park (still needs to be named). I am showing these pics to my blog readers EXCLUSIVELY!


 TAH DAH! The Main Entrance. It even has ticket booths!

 Here is the Candy Shop in a Cupcake Building! Those are sliding glass doors beside the cake display case!

The souvenir shop is a giant fish bowl! Inside you'll see nemo 'hangin' around :D Can you see some familiar faces? shhhhhhhh don't say anything! lol


Once you're inside the Water Park, You see this awesome Pirate Ship! Climb aboard with your friends to play a fun round of bumber boats. Break each other's boats and be the last one standing to win! The canon's are dispensers that launch chicken eggs!


Right next door is Winter Wonderland where you can practice your speed skating.

A little further into the Water Park you'll see a pyramid welcoming you to The Nile Lazy River where this gold toothed croc and his palm tree buddies show you a cool time. :)

I want to give a special thank you to my collaborators and awesome friends, Stacey/Sp0nG3BOoB, Josh/K1NG PWNAGE 98, SpartanMacky, Abel/BeastnessisLife, Az/PoP KoRN Xio, Luis/Sneaky Diablo, and Chynna/ DynamicWhisper3. If I missed someone, please forgive me...I'm on this map all day every day and it becomes quite transient. People come and go so often, it's hard to keep track.

In the same breath, I want to thank you all for putting up with my tyrant ways, lol. We all know, if its not perfect, Lady will tear it ALL down and either do it all myself or ask you to change it. I love you all for putting up with my OCD lol. <3

Welp, that's all for now (it was a LOT, I know lol). Tune in for my pre-release review later this week for the upcoming big game release season!

Thanks for reading.
Geek Love,
La Lady Panda
Sunday, October 7, 2012

Dinner for two?

I'm impatiently waiting for the 1.8.2 update to the Xbox 360 to finally arrive! I've been playing less but amping myself up to spend tons of time playing once the update comes out. 

If you love Minecraft as much as I do, check out the 1.8.2 update Celebration Sale on my etsy shop. 20% off on all Minecraft gear! 


In my desperation I decided to revisit some of my old creations. Ah how the time has changed me and my crafting ways lol. I make much bigger and piston-y creations now but when there were no pistons, I dedicated every ounce of creativity into the look of my structures. After Pandaland, I wanted to create a city. I succeeded in the construction of the city to about 90% of its potential. It's got schools, post office, hospital, church, fire department, bank, auditorium, botanical garden, community pool, hot air balloon, mall, movie theaters, gas station, restaurants and more!

I wanted to share some of these creations bit by bit (heehee bit) so I decided to throw in some pictures of some of the restaurants in my city.

Here's my favorite, the Krusty Krab!


I tried to make the inside as accurate as possible. Sorry about the poor quality of the photos. This was  before the lighting fix was applied. The menu is just like in the show. I included Mr. Krabs office, the kitchen, the walking freezer, the tables, the register, and SpongeBob's grill(furnace). :)


Another restaurant I made was near the high school, it's a McDonalds! It has a lobby area, counter with registers, and a drive thru! Menu and all :)


This is the Yumm Yumm Tepanyaki Palace! I had to put a layer of water in the ground floor so that the grill/tables which have glass covering a lava bottom wouldn't set the place ablaze. It took me 4 hours and 10 huge blazing fires to figure that one out. I'd be on the second floor building where a familiar sizzle would run through and ruin everything. It was frustrating lol but worth the hard work. 


I hope you like some of my restaurants. I have tons of other builds that I can show you on xbox if you send me a message to La Lady Panda gamertag. Keep an eye out on my blog too, I'll be updating more Minecraft build pics. I hope to have a PVR or PVR connect to be able to record my creations to upload here and youtube soon. Comment on here if you'd like me to visit some of your maps and check out what you have built. I would love to showcase it for you on my blog also. :)

Thanks for reading.
Love,
Mery Ann


Thursday, September 20, 2012

Free Doll Pattern!

My niece is turning 11 on Monday and for weeks I thought about the right gift, the best gift. I made her some butterfly hair clips (let me know if you want the pattern for these) and some ballet style slippers which I posted in the previous blog post.

At first, I thought she might not want a doll or would out grow it soon but I couldn't shake the thought that I wanted to make one for her anyway, so I did!

I found this fantastic pattern online through Pinterest.com and made some additions. It is expertly written and easy to follow so I didn't have to make any alterations. I have copied the basics below but i highly recommend going to her site on Craftster.com as she has some other amazing things to add on to the doll (the teddy bear and kitty are my favorite!).

Here is the link to the original pattern and creator:

http://www.craftster.org/forum/index.php?action=profile;u=174226;sa=showTopics;start=10

Here are some pictures of the doll I made for my niece with attention to the details like the jewelry and butterfly hair clip. :)


Materials:

- Yarn in various colors of your choice.
- Embroidery floss or yarn for the face.
- Sewing thread that matches the color of the yarn for the hair.
- A hook appropriate to the weight of the yarn. I personally used fingering weight yarn and
 a 2.0 mm hook, which resulted in a 8.5 inch doll.
- Yarn needle.
- Polyfill.

Note: When switching colors, the last loop you pull through the stitch before the switch 
already has to be in the new color.

Basic doll instructions

Head and body

R1: Using the skin color of your choice, make 6 sc into a ring.
R2: sc inc in next st, around (12)
R3: sc inc in next st, sc in next st, around (18)
R4: sc inc in next st, sc in next 2 st, around (24)
R5: sc inc in next st, sc in next 3 st, around (30)
R6: Work even (30)
R7: sc inc in next st, sc in next 4 st, around (36)
R8-R12: Work even (36)
R13: sc next 2 tog, sc in next 4 st, around (30)
R14: Work even (30)
R15: sc next 2 tog, sc in next 3 st, around (24)
R16: sc next 2 tog, sc in next 2 st, around (18) Stuff the head firmly. Change to the body
 color of your choice.
R17: Work even (18)
R18: sc inc in next st, sc in next 5 st, around (21)
R19-R25: Work even (21)
R26: sc next 2 tog, sc in next 5 st, around (18) Stuff firmly.
R27: sc next 2 tog, sc in next st, around (12) Stuff more.
R28: sc next 2 tog, around (6) Fasten off and weave in the end. Embroider a face 
according to your own taste, or look at the pictures for inspiration.

Legs

R1: Using the leg color of your choice, make 6 sc into a ring.
R2: sc inc in next st, around (12)
R3-R5: Work even (12)
R6: sc next 2 tog, sc in next 10 st (11)
R7: Work even (11)
R8: sc in next 5 st, sc next 2 tog, sc in next 4 st (10)
R9: Work even (10)
R10: sc in next 3 st, sc next 2 tog, sc in next 5 st (9)
R11: Work even (9)
R12: sc in next 7 st, sc next 2 tog 
R13: Work even 1 sc in each st around
R14: sc in next 2 st, sc next 2 tog, sc in next 4 st (7)
R15: Work even (7) Stuff the lower leg firmly at the bottom, and more lightly 
towards the top. The rest of the leg will be so thin, it doesn't need stuffing.
R16: sc in next 4 st, sc next 2 tog, sc in next st (6)
R17-R44: Work even (6). Fasten off, leaving a yarn tail for sewing. Make another leg, 
then sew both to the body.

Arms

R1: Using the skin color of your choice, make 6 sc into a ring.
R2: sc inc in next st, sc in next 2 st, around 

R3-R5: Work even  1 sc in each st around

R6: sc next 2 tog, sc in next 6 st (7)
R7: Work even (7) If neccessary, put a small amount of stuffing in the hand. The rest
 of the arm will be so thin, it doesn't need stuffing.
R8: sc in next 2 st, sc next 2 tog, sc in next 3 st (6)
R9-R22: Work even (6) Fasten off, leaving a yarn tail for sewing. Make another arm, 
then sew both to the body.


I really hope you like the pattern as much as I do. I think the author/creator's name on there is Wayuki.

Thanks for reading.
Love,
Mery Ann

Thursday, September 13, 2012

Ballet Slipper/Heart Patterns

Hey friends!

My niece is turning 11 in less than two weeks and I wanted to make her gift something really special. I looked around for free patterns for slippers and found a great one on youtube.

Here's the link:
http://www.youtube.com/watch?v=x5SBXwDPh8I&feature=relmfu

I love the chunky style and ribbon idea so I used that in a ballet slipper style and added some flare in all of my niece's favorite colors. Here is the pattern with my alterations to it. 

(All credit for the basis of the pattern goes to originator of the youtube.com video listed above. Her version of the pattern can be found on etsy.com as well.)


Hook: K/Size 10.5/6.5 MM

Use two strands of yarn from either one skein of color or two. I used two in hot pink for mine.

Tools: 
Yarn Needle
Ribbon (at least long enough to tie around the ankle)

Stitches:
SC- Single Crochet
SLST- Slip Stitch

With both strands at the same time, Chain 2.

- 9 SC in 1st chain. SLST into first chain. Chain 1 and Turn.

- 2SC in every stitch around (18 STs total)  SLST into first chain. Chain 1 and Turn.

(If you require a wider slipper, add another increase row as follows:

1SC in 1st stitch, 1SC in next stitch, 2 SC in next stitch, repeat all the way to the end.  SLST into first chain. Chain 1 and Turn. Should be 24 stitches around)

- *1SC in every stitch around then SLST into first chain. Chain 1 and Turn.*

*Repeat until the front of the slipper reaches the start of your toes (Usually 4-6 rounds)

From here until the end you will be crocheting rows but not all the way around. 

-*1SC in the next 10 stitches (you may want to increased this to 12 stitches if you want your slipper to cover more of your foot. If using the wider stitches you may need to increase this to 16 SC) then SLST into first chain. Chain 1 and Turn.*

*Repeat until the length of the slipper reaches the back of the heel. 

-Fold the slipper in half at the heel end. SLST the two halves together, tie off, and weave in ends.

At this point you may use your ribbon, woven around the edges of the slipper at the opening to create the ballet style. 

I added some stitched hearts for added adorableness! Here is a small heart pattern:

Hook: G/4.5MM

Stitches:
SC- Single Crochet
HDC- Half Double Crochet
DC- Double Crochet
SLST- Slip Stitch


Chain 4, Join with a SLST at first chain to create a loop. Chain 1


-In loop: 1HDC, 1DC, 1HDC, SLST, 1HDC, 1DC, 1HDC, 3SC, 1DC, 3SC then SLST into first chain. Tie off and leave at least a 6 inch tail for sowing.

It should look like this! I stitch it tight so the shape stands out more. :)


That's all for now friends. I hope you like the free patterns and you have a blast making your ballet slippers!

Thanks for reading.
Love,
Mery Ann

Wednesday, August 15, 2012

DIY Crochet Patterns

Today has been a long and productive day for me. I went to the mechanic and got a lovely bill exceeding $550.00 to fix my grinding brakes and calipers. I went to the grocery story and spent more than $250 in groceries. I called my insurance company to get it reinstated which should be another lovely monthly bill and doctor and hospital copayments. Needless to say, keeping up with the cost of living can be daunting and every little bit helps.

Since I've learned to crochet I have been making a lot of varied crocheted projects but it didn't hit me how much it could help around the house. I found some awesome patterns for household items on Pinterest and Ravelry and I would love to share them with you.

Loofa's aren't exactly expensive but it can be very annoying if the cheap store bought ones keep unraveling and breaking apart for you. Here's the answer! This pattern is not my own creation, the original creator and her awesome blog can be found here:
http://virkning-crochet.blogspot.com/2011/05/duschboll-i-bambu.html


Bath puff

Yarn: Bamboo Soft, 100m/50g, from Ullcentrum
Hook: 3½ - 4mm (crochet loosely)

Ch 5 sl st in first ch to make ring
Rnd 1: ch 3 (counts as dc), 14dc in ring, join with sl st in top of beg ch-3 = 15dc
Rnd 2: ch 3 (counts as dc), 4dc in same st as joining, *5dc in next dc*, repeat, join with sl st in top of beg ch-3 = 75 dc
Rnd 3: ch 3 (counts as dc), 2dc in same st as joining, *3dc in next dc*, repeat, join with sl st in top of beg ch-3 = 225 dc
Rnd 4: ch 3 (counts as dc), 2dc in same st as joining, *3dc in next dc*, repeat, join with sl st in top of beg ch-3 = 675 dc

Fasten off. Make a twist of the remaining yarn. The finished product is about 10cm in diameter.


I loved Swiffer products when they first came out on the market, then after some time, the refill cost piled up. If like me, you're ready to upgrade to a more permanent and less costly solution, why not crochet dusters and mops? I found this pattern on ravelry.com. Check out this Swiffer Duster by Krysten L. & Gherkin’s Bucket :


copyright Krysten L. & Gherkin’s Bucket 2007. Don't steal my stuff y'all. It's for personal use only, to bring joy to others.
Give credit where credit is due. Selling the finished product for non-profit charity uses is OK.


Materials
Size H (US 8) crochet hook 1⁄4 oz worsted weight kitchen cotton (I used Sugar n Cream) 1 1⁄4 oz machine-washable novelty yarn (dependent upon type ~35 yards)
Abbreviations
Ch – chain Sc – single crochet Ea – each Dc – double crochet Tfl – through the front loops Hdc – half double crochet Sl st – slip stitch St - stitch Rep - repeat
Pattern
Ch 21 Sc in 2nd ch from hook, sc in ea ch across, turn (20 sc)
Create Round: Ch2,*dctfloffirst5sc,hdctflinnext10sc,dctflinlastfivesc,ch2*,turnwork and rep from * to * working in remaining loops from the row of sc you just worked into (i.e., what was the back loop of each stitch), join with sl st to first dc of the round
Close Round: ch 1, sc tbl of both sides of previous round all the way across (this will create a pocket, and leave a ridge to attach the novelty yarn to later), turn (20 sc)
Repeat last two lines once more, fasten off and weave in ends.
Attach novelty yarn to one loop of an edge stitch on the long side with a sl st, ch 10 loosely, sl st into loop of next st. (SEE NOTE BELOW)
* Sl st in loop of next stitch, ch 10 loosely, sl st in loop of next st *, rep from * to * across.
At the end of the row, ch 2 and turn, continue back in the same manner through the “ridge” of loops you created when you closed the round. Repeat for 2nd ridge and the other side edge; you will have four ridges of novelty yarn loops. Fasten off and weave in ends.
Slip prongs of Swiffer Duster into the two pockets and get dusting! Note that the first time you put it on it will be snug and may require some “scooching” to get the handle prongs all the way in.
NOTE – Use my directions for the fringe as a guide, if you have particularly bulky novelty, you may need to adjust these directions. Try making your chain length a little longer and slip stitching into every other loop, etc. It all just depends on how loose or compact you want the dusty part to be: looser and longer fringe will allow for more corner and small places dusting; compact and shorter fringe will make for a more “scrubby” duster.
You can also purchase these pre-made through my etsy shop, for those of you who are less than crochet-inclined. www.gherkinsbucket.etsy.com

For this Reversible Swiffer mop, please click this link:


Last but not least is all cotton scrub pad's for washing your face and removing make up:

http://barbarabradford.blogspot.com/2009/01/butterfly-facial-scrubbie-gift-set.html


I'm going to keep searching for more ways to put my skills to the test and I'll be sure to share my findings with you, my friends.

Thanks for reading.
Love,
Mery Ann

Thursday, August 9, 2012

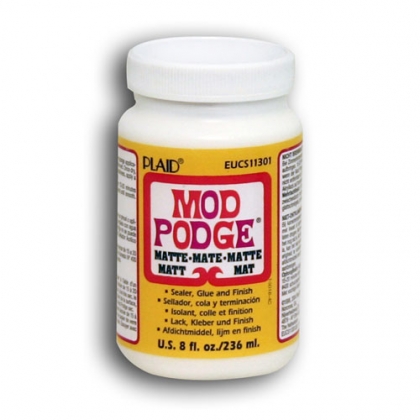
Mod Podge Wonders!


I don't know about you guys, but I'm a Pinterest fanatic. The funny thing is, I'm pretty damn lazy...and usually strapped for bucks so as much as I want to DIY the crap out of everything, I never actually get around to creating those awesome crafts. I first heard about Mod Podge when I started pinning and pretty much every one kept saying how expensive it was. In some cases it can be up to 8 dollars a bottle. I don't know about you but eight bucks is a lot at my house. 


When I saw all the cool things you can do with it, I really wanted to try it. I'm especially interested in the yarn related crafts that float around Pinterest. As a result, I went on a search for the makings of this wondrous device. As it turns out, it's a lot simpler than I thought it would be. I wanted to share it with you, so here's the recipe:

Mod Podge in a Pint Jar (matte)

Fill jar half way up with white glue (like Elmers)
Then fill jar up with water.
Shake Well.

This is a 50-50 mixture glue/water.

It will have a Matte finish.
If you would like a Glossy finish, add 1 TBS of clear varnish.
Shake it!

Now that you know how to make it, check out this amazing blog on how to use Mod Podge for fun crafty projects 


That's all for now friends but let me know if you liked this info and share any and all crafts you make from it. I'd love to see what you come up with. :)

Thanks for reading.
Love,
Mery Ann

Friday, August 3, 2012

Is anybody out there?

I've been working on this blog for a few weeks now and I don't think I've put enough of myself in it. I am by nature, a writer. My thoughts are driven by analogies, my visions are riddled with adjectives, my words are flourished with verbal scenery. Every time I witness something new or awe inspiring, in my brain I'm working out the most polished and interesting way of describing it, mostly to myself and often to whomever is nearest. 


My closest friends and family know me as, well, a know-it-all. I don't mean that in a negative way mostly but it can have a connotation to it that can sometimes sound distasteful. I take it as a compliment. 


I love teaching. As long as I can remember, I have always wanted to be a teacher. One year, after the last day in my fourth grade class, my teacher let me take home the most worn text books to keep. I spent the entire summer playing 'school'. I would set up my bedroom floor as a classroom with teddy bears and baby dolls as students and my poor six year old brother as the only mobile pupil. I would prop up a composition notebook on the frame of my red metal bunk bed and try my best to pretend it was a black board. I taught my 'students' about our solar system, addition, and read to them my favorite Judy Bloom books. We had lunch with pudding snacks and nap time where my brother would run off to play something else usually. 


He was always a good student. I taught him his ABC's on a metal white board with colored plastic magnets. I even remember as a 6 year old being on all fours next to him as he lunged back and forth trying to imitate my crawling. 


Those are some of my fondest memories of my little brother. He taught me just as much as I taught him. His patience and unconditional love have always been a priceless lesson for me. 


If you are out there, and you are reading this, I promise to put a little more of myself in here. I'm an open book and if I do say so myself, it should be interesting to read.


Thanks for reading.
Love,
Mery Ann

Saturday, July 21, 2012

**Christmas in July**

I've had the idea to make a blog post about Christmas in July and today feels just right for it. I love Christmas!


I'm doing it as a pick me up mostly because lately I've been feeling down and in pain. I went to the hospital to check a painful lump in my right breast and they referred me to Libby's Legacy Breast Foundation in downtown Orlando on Orange Ave. for a free mammogram.


If you're a woman, please get yourself checked. Its better to be safe than sorry.


 If you have no health insurance and you live in Orlando, you can call and set up an appointment with Libby's Legacy here 


1718 South Orange Ave
Orlando FL 32806
(407)898-8991


If you would like more information on where to get free screenings in your area, please check out this site:


http://apps.nccd.cdc.gov/dcpc_Programs/default.aspx?NPID=1


I'm hoping the lump in my breast is just fibrous and swollen due to fluctuating hormones but I'm going to get it checked either way.


Now that you know why I need a pick-me-up, let's get on to the good stuff...recipes, patterns, and ideas!


RECIPES

Here's a fun one for "Lumps of Coal". Use a regular rice krispies treat recipe from this site:


and add black food coloring! Look how cool it looks!

There are some great Christmas snack recipes at the Pilsbury site too! Check out these Santa Crackers


DECORATION

Check out this pipe cleaner Christmas Tree from Martha Stewart:


TOY IDEAS

Make some CLOUD DOUGH and put it in a decorative container to play with the kids! All you need 8 cups of flour and 1 cup of baby oil. It feels like flour but you can mold it!


PATTERNS

Here's an idea for crochet Christmas trees for a garland or ornaments.


Here's another garland idea, Christmas Lights!
This one is a Ravelry.com Download. You need to be a member of the site to download the free pattern**


These are so cute! Here are some more traditional ornaments.


That's all for now friends. Stay tuned for more stuff.

Thanks for reading,
Love,
Mery Ann