Showing posts with label ideas. Show all posts

Monday, July 8, 2013

More Hearts

So, here I was thinking my blog had disappeared into obscurity and completely giving up on it and all along people have been checking it out. I'm pretty happy about that and in fact its very touching to know.

In my life I get very distracted by my medical and mental conditions. They take up most of every single day. I pretty much sit in worry and anxiety trying all day to think about anything but them. Through this introverted battle of paranoia, illness, and depression, I spend most of my foggy days just thinking about how crappy I feel.

On some days, the real world punches through and I get a glimpsed at what my life is supposed to be like and what's really important. This blog is important. That's hard for me to remember sometimes.

Thank you to Devi for submitting a comment and letting me know that one of the links for free heart crochet patterns was not working.

Here are some suitable (I hope) alternatives for you guys. <3


If you're good at reading diagrams, this page has loads to choose from! 


*The first few times I clicked this link not more than an hour ago, it worked. It has since stopped working for me. I'm sorry in advance if it doesn't work. :(


Please note that all of these pictures belong solely to their creators as listed in the links below them. I did not make these crochet creations, patterns, or take the pictures. Give credit where credit is due and be sure to read the guidelines for use of the pattern if and when they are listed. 

Thank you so much for reading!
Love,
Mery Ann

Saturday, May 25, 2013

"Honey, I Shrunk the Steves" MORE PICS!

I've had a lot of requests for an album on the "Honey, I Shrunk the Steves" map so  I'm posting them here, on my blog. :)

I've been hard at work doing landscaping and adding more (yes, more!) detail on the map lol. 

There's bits and pieces that I wasn't happy with before that I find myself tinkering with daily. Mainly it's the exterior that has been getting some TLC. 

I spent so much time with the small details inside that I ended up with a giant brick wall all around the house....not very appealing. So, I've added some gardening and fences as well as roof and brick details.

I don't know if you guys read about it on my twitter but I've been considering turning this into an adventure map once the house is finished. I even built a train station that takes you to the mailbox as a starter point for it. 

Unfortunately, I've never created an adventure map and need some serious help with it. 

If anyone is interested, you can reply here on my blog with the following information:

Your Gamertag:
Pictures/Links to any adventure builds you've created:
How often are you on xbox"
How many hours you can work on the build daily/weekly:
Your age:

I know age doesn't tell your maturity but I get a lot of younger kids who want to play/build and after a little while they get bored and start trolling/griefing. I don't have time for that, I'm sorry.

Ok, here's the photo's I promised:

Here's the kitchen, I know it looks gritty but I had to add filters to light it up. :/


This is the master bedroom.


This is the spare bedroom.


Here's part of the backyard.


Close up of Norman the Gnome ^.^ 


Thanks for reading!
Love,
La Lady Panda


Thursday, September 6, 2012

FUZZ be gone!

I'm a t-shirt maniac. If I could wear a t-shirt for every occasion, I would and believe me, I try to. The saddest days are when my favorite shirts loose they're new shirt gleam and begin to look old. I've noticed that the worn look can sometimes be a result of bad lint, or fuzz.

In the past I've used electric lint removers for t-shirts and sweaters but I hated how the shaver sometimes pulled up strands and created nicks in my fabric, so I gave that up.

Yesterday I was in the bathroom, waiting for my face mask to dry up so that I could wash it up and I saw my boyfriends collection of cheap razors (which he uses once, and then instead of discarding, leaves them on the sink). I looked down at my t-shirt nighty and thought, hmm why not?

I shaved off the fuzz and was amazed at the newness bouncing back at me from my fabric! I figured I had to share this with you guys.


I'm rushing to the nearest dollar store on my next payday to stock up and refresh my favorite threads. Be careful when you're shaving your clothes and what materials you are using the shaver on so that you don't get any nicks or snags. Try using a fresh razor and no water as that seems to work best and good luck friends!

Thanks for reading!
Love,
Mery Ann

Wednesday, August 15, 2012

DIY Crochet Patterns

Today has been a long and productive day for me. I went to the mechanic and got a lovely bill exceeding $550.00 to fix my grinding brakes and calipers. I went to the grocery story and spent more than $250 in groceries. I called my insurance company to get it reinstated which should be another lovely monthly bill and doctor and hospital copayments. Needless to say, keeping up with the cost of living can be daunting and every little bit helps.

Since I've learned to crochet I have been making a lot of varied crocheted projects but it didn't hit me how much it could help around the house. I found some awesome patterns for household items on Pinterest and Ravelry and I would love to share them with you.

Loofa's aren't exactly expensive but it can be very annoying if the cheap store bought ones keep unraveling and breaking apart for you. Here's the answer! This pattern is not my own creation, the original creator and her awesome blog can be found here:
http://virkning-crochet.blogspot.com/2011/05/duschboll-i-bambu.html


Bath puff

Yarn: Bamboo Soft, 100m/50g, from Ullcentrum
Hook: 3½ - 4mm (crochet loosely)

Ch 5 sl st in first ch to make ring
Rnd 1: ch 3 (counts as dc), 14dc in ring, join with sl st in top of beg ch-3 = 15dc
Rnd 2: ch 3 (counts as dc), 4dc in same st as joining, *5dc in next dc*, repeat, join with sl st in top of beg ch-3 = 75 dc
Rnd 3: ch 3 (counts as dc), 2dc in same st as joining, *3dc in next dc*, repeat, join with sl st in top of beg ch-3 = 225 dc
Rnd 4: ch 3 (counts as dc), 2dc in same st as joining, *3dc in next dc*, repeat, join with sl st in top of beg ch-3 = 675 dc

Fasten off. Make a twist of the remaining yarn. The finished product is about 10cm in diameter.


I loved Swiffer products when they first came out on the market, then after some time, the refill cost piled up. If like me, you're ready to upgrade to a more permanent and less costly solution, why not crochet dusters and mops? I found this pattern on ravelry.com. Check out this Swiffer Duster by Krysten L. & Gherkin’s Bucket :


copyright Krysten L. & Gherkin’s Bucket 2007. Don't steal my stuff y'all. It's for personal use only, to bring joy to others.
Give credit where credit is due. Selling the finished product for non-profit charity uses is OK.


Materials
Size H (US 8) crochet hook 1⁄4 oz worsted weight kitchen cotton (I used Sugar n Cream) 1 1⁄4 oz machine-washable novelty yarn (dependent upon type ~35 yards)
Abbreviations
Ch – chain Sc – single crochet Ea – each Dc – double crochet Tfl – through the front loops Hdc – half double crochet Sl st – slip stitch St - stitch Rep - repeat
Pattern
Ch 21 Sc in 2nd ch from hook, sc in ea ch across, turn (20 sc)
Create Round: Ch2,*dctfloffirst5sc,hdctflinnext10sc,dctflinlastfivesc,ch2*,turnwork and rep from * to * working in remaining loops from the row of sc you just worked into (i.e., what was the back loop of each stitch), join with sl st to first dc of the round
Close Round: ch 1, sc tbl of both sides of previous round all the way across (this will create a pocket, and leave a ridge to attach the novelty yarn to later), turn (20 sc)
Repeat last two lines once more, fasten off and weave in ends.
Attach novelty yarn to one loop of an edge stitch on the long side with a sl st, ch 10 loosely, sl st into loop of next st. (SEE NOTE BELOW)
* Sl st in loop of next stitch, ch 10 loosely, sl st in loop of next st *, rep from * to * across.
At the end of the row, ch 2 and turn, continue back in the same manner through the “ridge” of loops you created when you closed the round. Repeat for 2nd ridge and the other side edge; you will have four ridges of novelty yarn loops. Fasten off and weave in ends.
Slip prongs of Swiffer Duster into the two pockets and get dusting! Note that the first time you put it on it will be snug and may require some “scooching” to get the handle prongs all the way in.
NOTE – Use my directions for the fringe as a guide, if you have particularly bulky novelty, you may need to adjust these directions. Try making your chain length a little longer and slip stitching into every other loop, etc. It all just depends on how loose or compact you want the dusty part to be: looser and longer fringe will allow for more corner and small places dusting; compact and shorter fringe will make for a more “scrubby” duster.
You can also purchase these pre-made through my etsy shop, for those of you who are less than crochet-inclined. www.gherkinsbucket.etsy.com

For this Reversible Swiffer mop, please click this link:


Last but not least is all cotton scrub pad's for washing your face and removing make up:

http://barbarabradford.blogspot.com/2009/01/butterfly-facial-scrubbie-gift-set.html


I'm going to keep searching for more ways to put my skills to the test and I'll be sure to share my findings with you, my friends.

Thanks for reading.
Love,
Mery Ann

Thursday, August 9, 2012

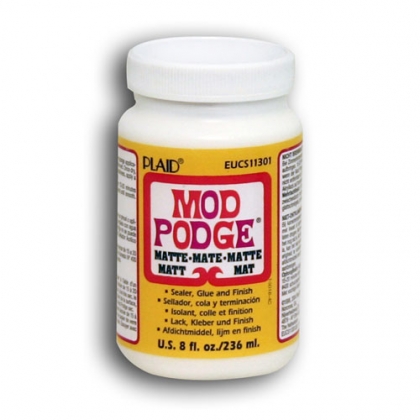
Mod Podge Wonders!


I don't know about you guys, but I'm a Pinterest fanatic. The funny thing is, I'm pretty damn lazy...and usually strapped for bucks so as much as I want to DIY the crap out of everything, I never actually get around to creating those awesome crafts. I first heard about Mod Podge when I started pinning and pretty much every one kept saying how expensive it was. In some cases it can be up to 8 dollars a bottle. I don't know about you but eight bucks is a lot at my house. 


When I saw all the cool things you can do with it, I really wanted to try it. I'm especially interested in the yarn related crafts that float around Pinterest. As a result, I went on a search for the makings of this wondrous device. As it turns out, it's a lot simpler than I thought it would be. I wanted to share it with you, so here's the recipe:

Mod Podge in a Pint Jar (matte)

Fill jar half way up with white glue (like Elmers)
Then fill jar up with water.
Shake Well.

This is a 50-50 mixture glue/water.

It will have a Matte finish.
If you would like a Glossy finish, add 1 TBS of clear varnish.
Shake it!

Now that you know how to make it, check out this amazing blog on how to use Mod Podge for fun crafty projects 


That's all for now friends but let me know if you liked this info and share any and all crafts you make from it. I'd love to see what you come up with. :)

Thanks for reading.
Love,
Mery Ann